Some years ago, when I started thinking about building an hexapod, I used to study the datasheets of every servo I stumbled upon to get a grasp of what would be the best compromise for speed, accuracy, torque and price. When you have to buy 18 servos you can’t just buy what seems to be a good compromise, you have to be certain that you found the right one. Of course without limits for the budget one could just go for the Dynamixel AX-18A or AX-12 as they are the kings for robotics application. Alas, that is not the case for a hobby project so I swept the net for obscure chinese sites looking for servos and ordered a unit for each one that seemed promising. However choosing the servo was just a piece of the puzzle, I knew that the real challenge would be to make them move all together at the same time so to get an idea of what kind of electronics and batteries I would need for a big hexapod I decided to build a smaller one as a prototyping platform since small servos are quite cheap. That was a good idea indeed and I was able to make many adjustement to the prototype while being able to advance in the software side of the things. When I had a complete idea of what I would need for the big hexapod, I was left with a complete software stack for making animations as well as a basic working prototype for IK movements. I was left also with a lot of cheap 9G servos. And so I started building small biped robots using those servo, however I didn’t feel like reinventing the wheel so I just searched for biped on the usual suspects site such as Thingiverse, github and I immediately fell in love with a design for a robot called “BOB” (this one on thingiverse https://www.thingiverse.com/thing:43708)
Now let me be very clear about this, I just don’t know who was the first one that made this robot nor its pedigree, you can literally find dozens of variations of BOB (Zowi, OTTO etc), however the first one I stumbled upon was BOB so if someone is willing to make a family tree of these robots I’ll gladly add it here, for now let us all stick with BOB.
So my BOB was born.
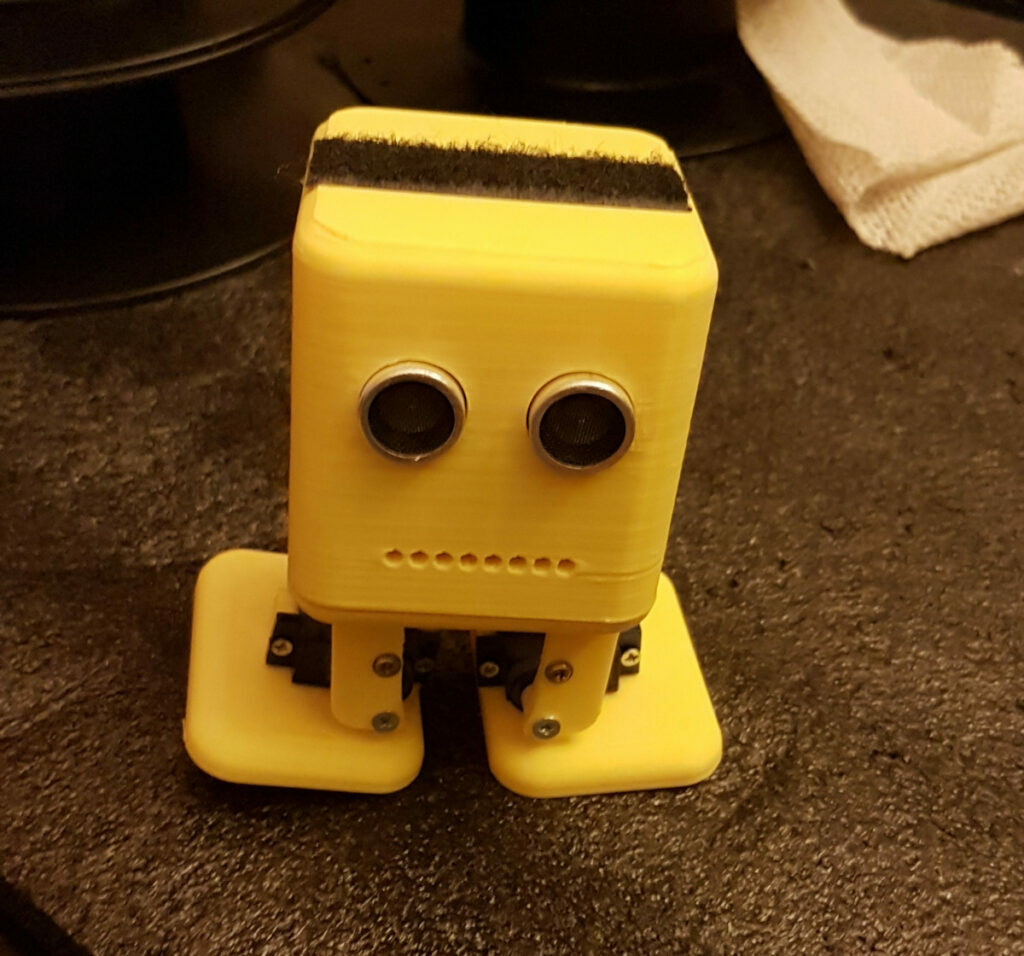
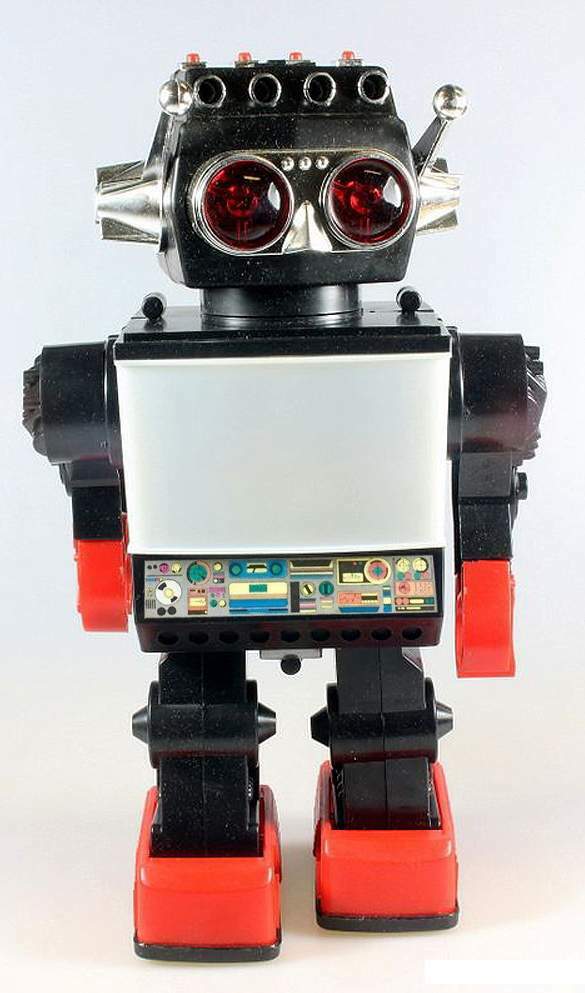
I printed the pieces from thingiverse and built it using an Arduino nano clone, an ultrasonic sensor (HC-SR04), a piezo buzzer, a lipo battery with as well as an ubec. I had a lot of fun programming this little guy and while it didn’t have fancy leds or things like that, by just moving its feets around and buzzing sounds with the piezo, it already showed a lot of character. I managed to build a simple interface using the ultrasonic sensor as input and the piezo as output so, for example, making a “stop” sign in front of it would make it switch mode of walking, then a double timed “stop” would make it move backward and so on. This robot somehow reminded me of an old toy I had when I was a kid, the “Saturn” robot or cheap chinese whatever one.
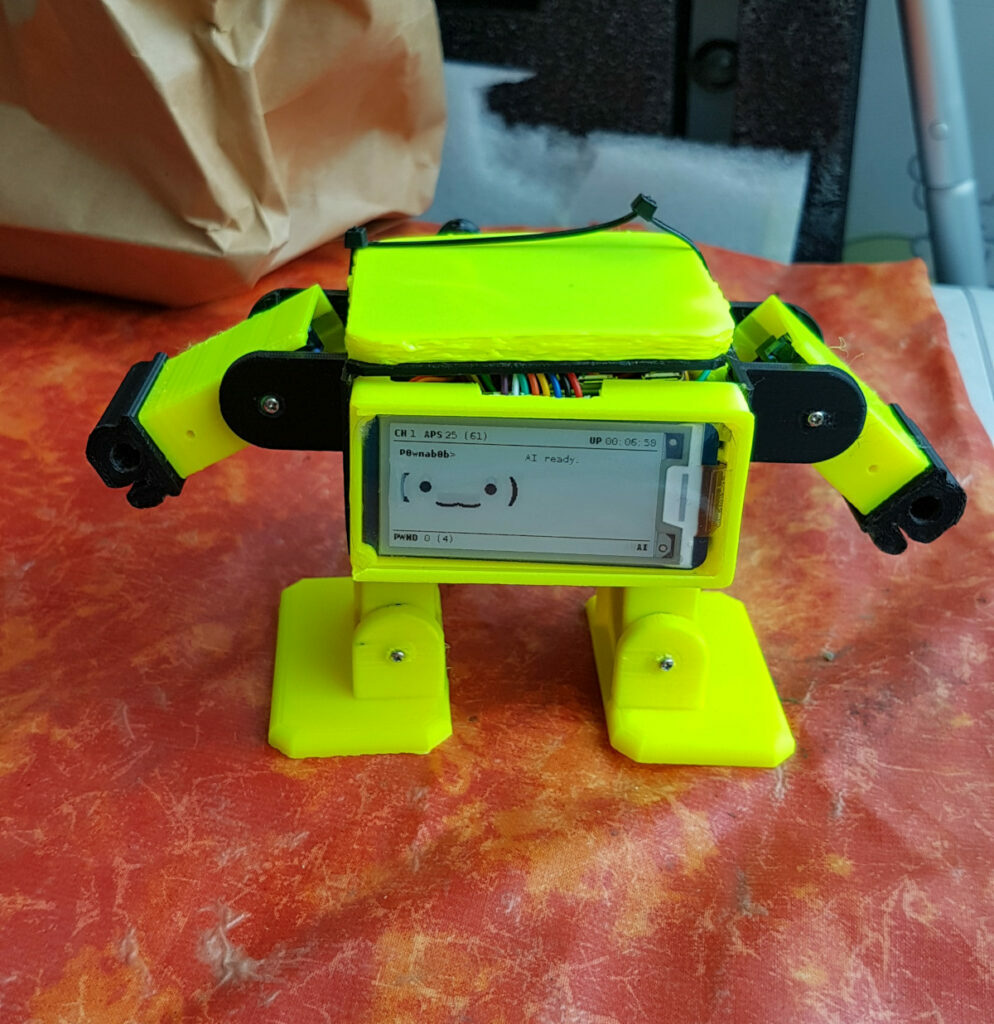
So I was stuck with the idea of adding an lcd screen to my BOB robot to make it even more expressive. Then life took over and little BOB was left collecting dust. When the e-ink screen mania took the net I had the idea to use an e-ink screen instead of an lcd so the last image shown on the epaper would just be there even when the robot was powered off and could be used to make him assume funny poses. but you gueesed it, I just coulnd’t find the time to do it. Then, the great mind of @evilsocket came up with the “Pwnagotchi” and I just couldn’t resist mixing the two together and so, P0wnab0b was born!
But first, a bit of background about the pwnagotchi. It is the brainchild of the uber hacker @evilsocket, who is also the author of Bettercap among other cool things. Quoting from the pwnagotchi.ai site:
Pwnagotchi is an A2C-based “AI” powered by bettercap and running on a Raspberry Pi Zero W that learns from its surrounding WiFi environment in order to maximize the crackable WPA key material it captures (either through passive sniffing or by performing deauthentication and association attacks). This material is collected on disk as PCAP files containing any form of handshake supported by hashcat, including full and half WPA handshakes as well as PMKIDs.
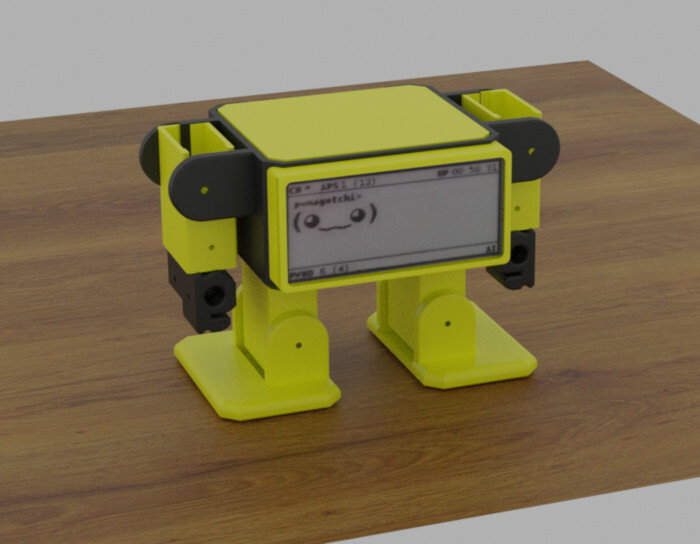
So basically you get to have your own tamagotchi that feeds on handshakes, how cute is that? Could it be even more cutier? Well, if you have read something on this site, for me nothing say cuteness better than a little robot waving around. I started gathering the sizes from the Waveshare site about the screen that was used in this project, also found out that the great @elkentaro already made a case for the pwnagotchi on thingiverse (https://www.thingiverse.com/thing:3879459 ), the only thing left out was a BOB variation that would look nice in a squared proportion. After searching a while I settled with the “TinyPlan Minions” (https://www.thingiverse.com/thing:2414933 ) from the great George Chiou. I’ve already built some robots designed by ShinWeiChiou so I knew that his design are quite good (oh, by the way, if you ever come here, I’m one of the MiniPlan early builder! what’s up bro? and what’s that craze about softair guns mod? you used to make great robots pal ..). I fired up my trusty Blender and started working with the meshes .. after a while I came up with a modified body that would allowed for the screen frame and made these very first renders of what would eventually be P0wnab0b. Notice that I didn’t bother adding the legs yet as I just wanted to visualize it and choose a color scheme.
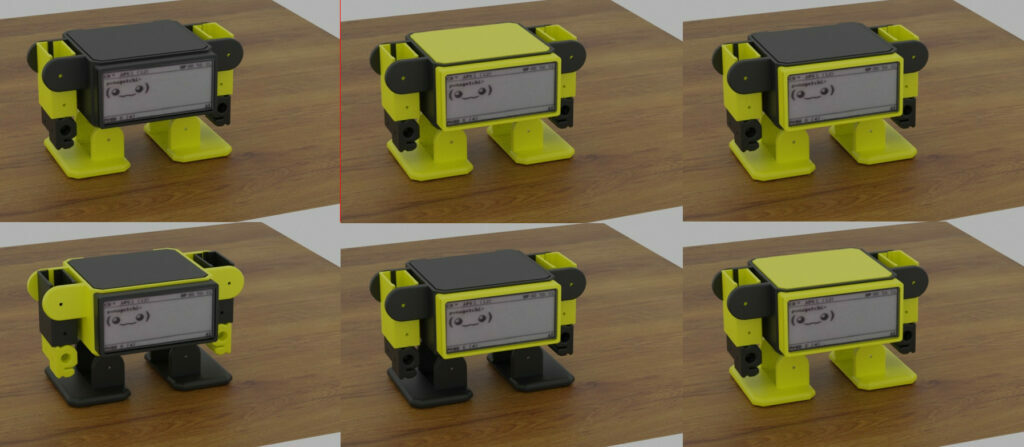
I choose this color scheme and added the legs
If you build robots, particularly bipeds, you may already notice that with the legs this far apart from the center of mass it would probably never be able to walk properly (at least, it won’t be able to lift itself using a leg only unless the leg is very heavy, which is not the case) but actually I just wanted to maximize its cuteness and with the legs this far apart it has a cool chubby look. Still don’t believe me? then look, I calculated that to make it properly walk it should be built like this
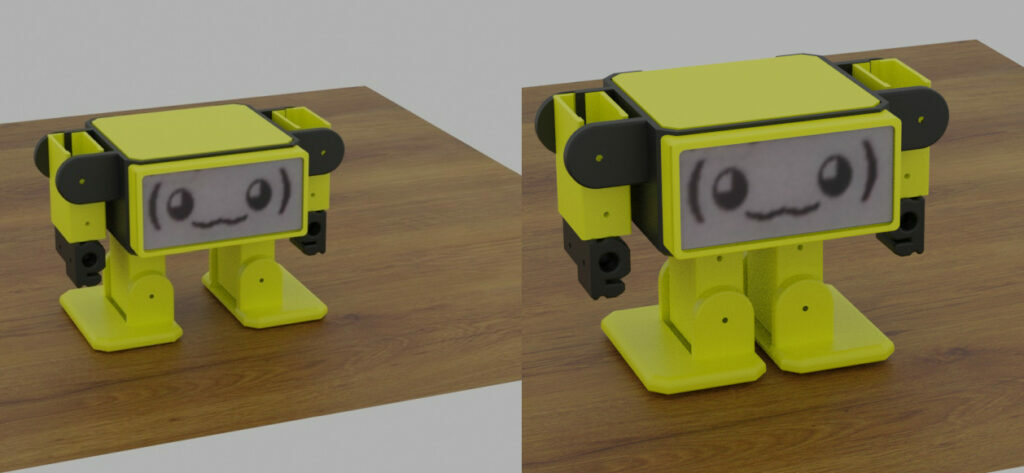
So i went for cuteness.
I wish I could write that it was easy gathering the parts but it was not.
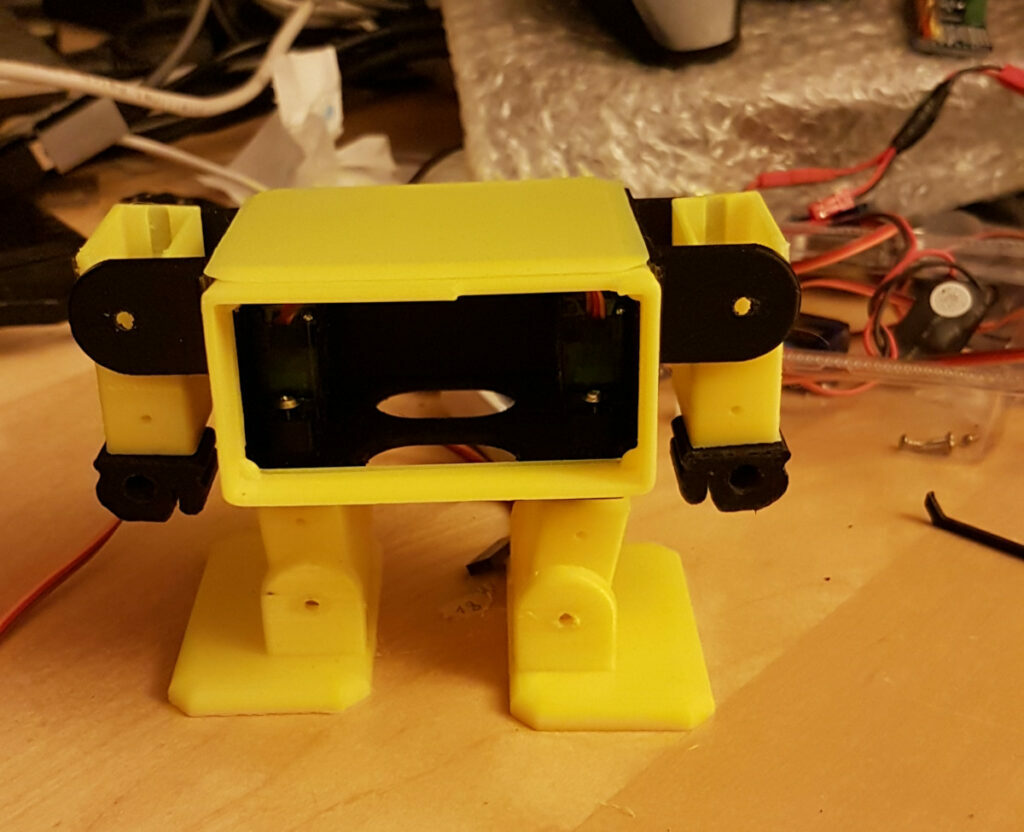
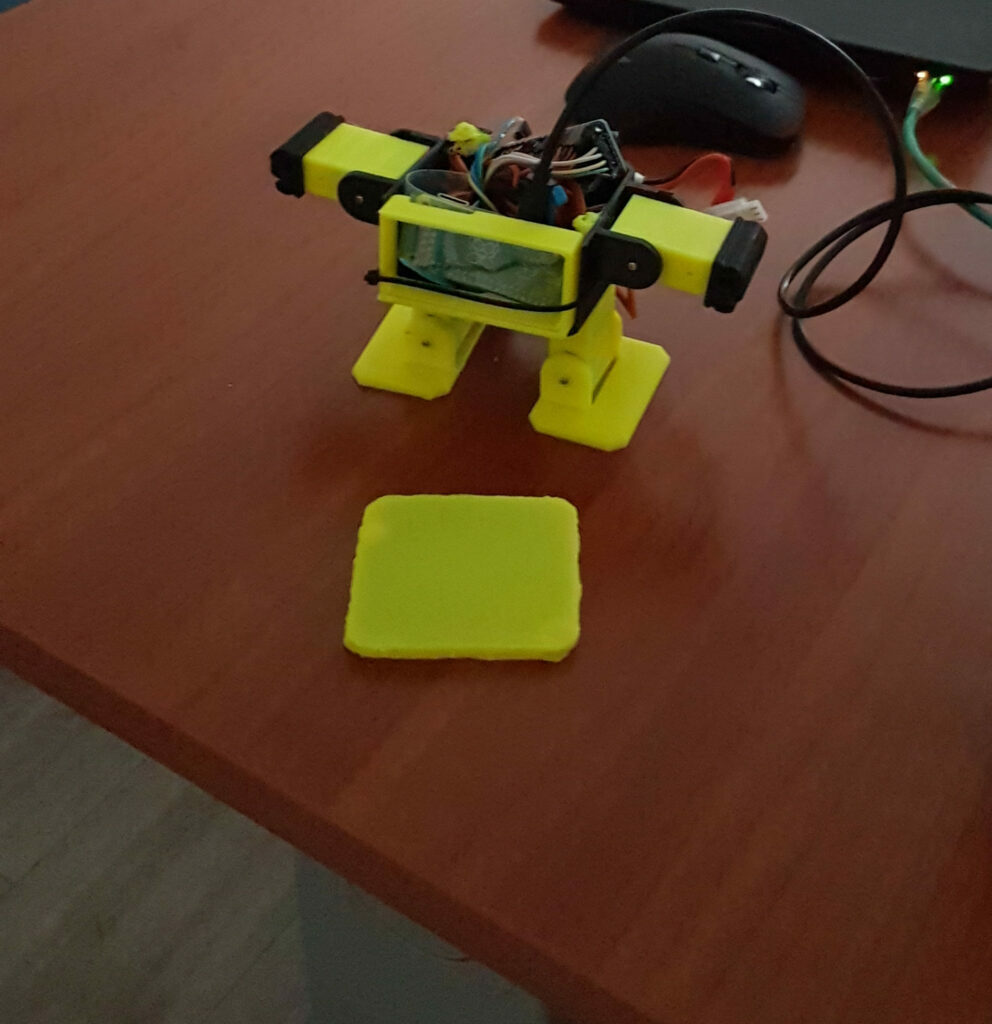
I printed the pieces just fine without failures, also the electrical part was quite easy (thanks to the availability of servo boards, UBEC etc) but the real pain was the screen. I actually built the robot and had it moving in just two days, then I had to wait almost two months for the screen.
While we try to visualize the pain having to wait for the screen, let us ease the feelings with the photos ..
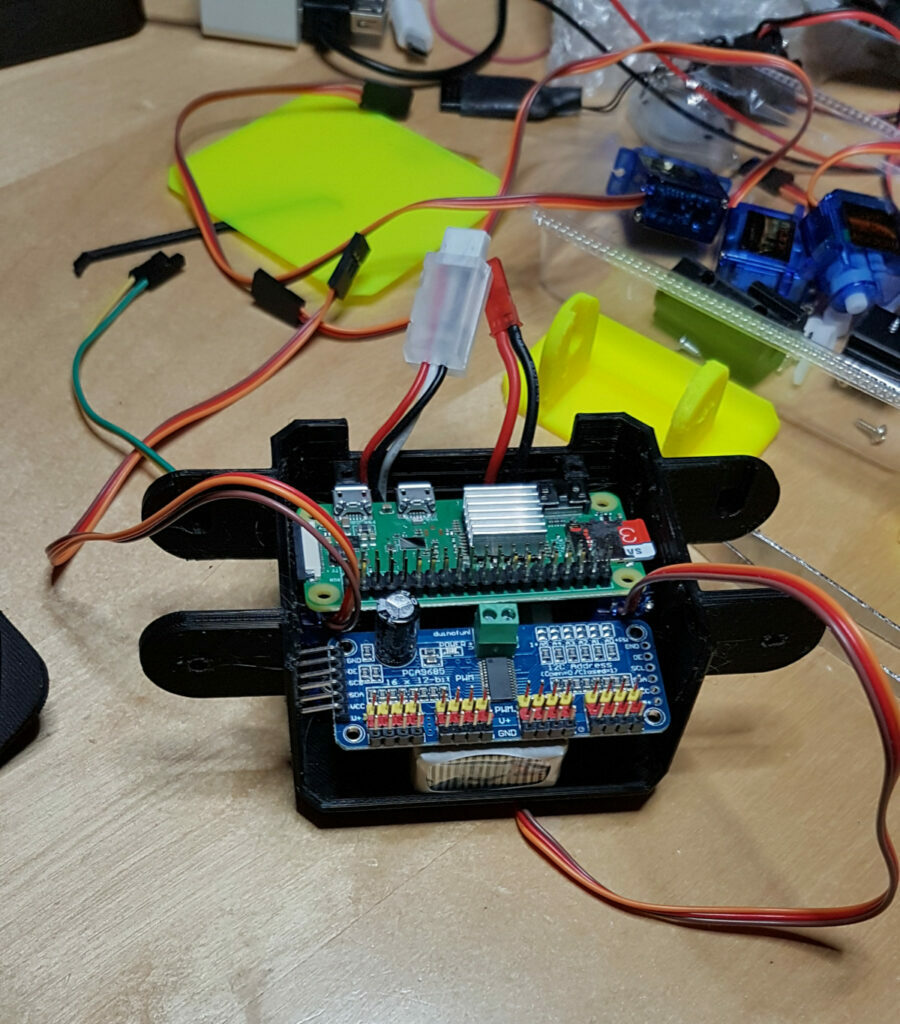
It turned out that with a bit of desoldering I could actually have enough room inside the robot to fit the lipo. However at this stage I didn’t feel like desoldering the headers / cutting the servo cables etc so I choose to mount the lipo in the back, like a backpack
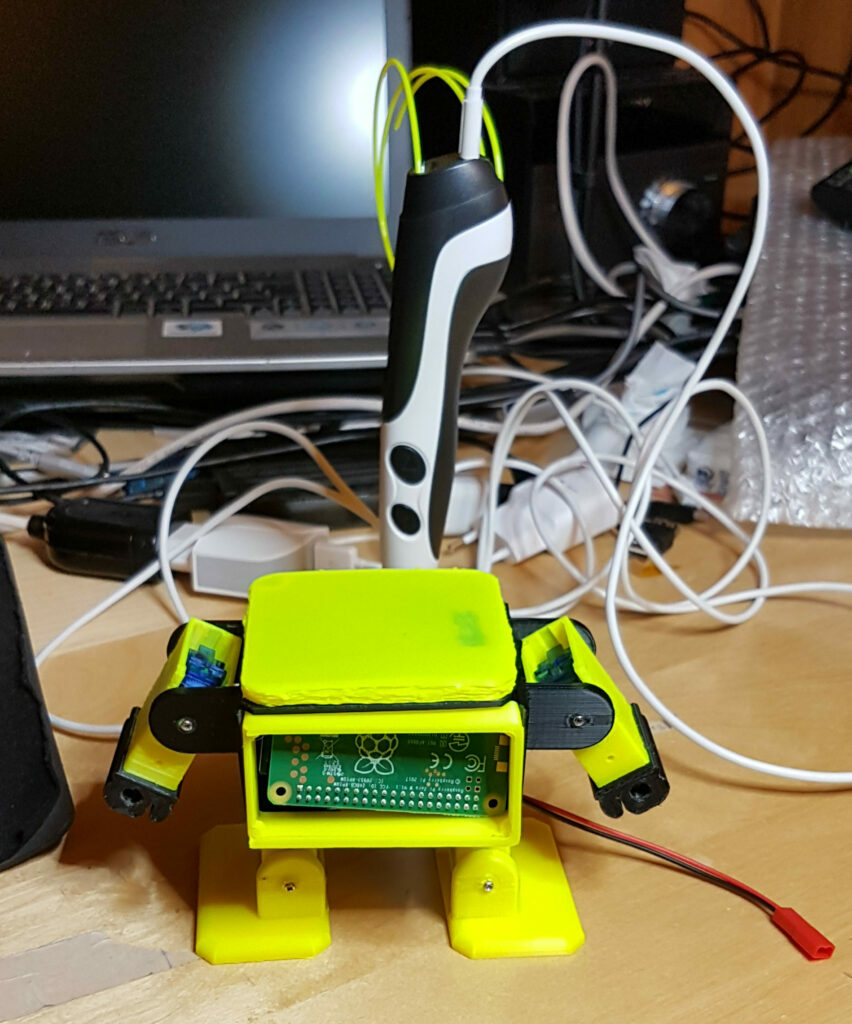
It was already time to think how to attach the upper lid. Since i printed a simple lid that was just used as a placeholder and since I had some small lenghts of yellow pla I just decided to sketch the sides of the lid with a 3d pen
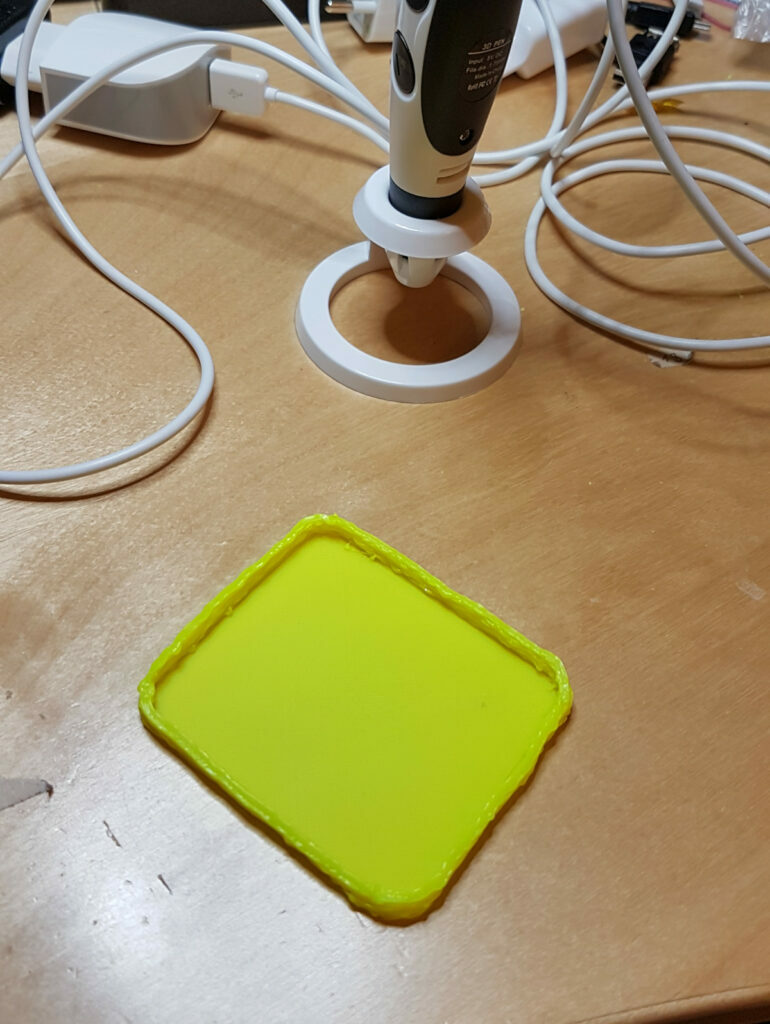
Once the sides were made, I dediced to just use some neodimium magnets to keep it in place and guess what? I just sketched the magnet sockets with the 3d pen.
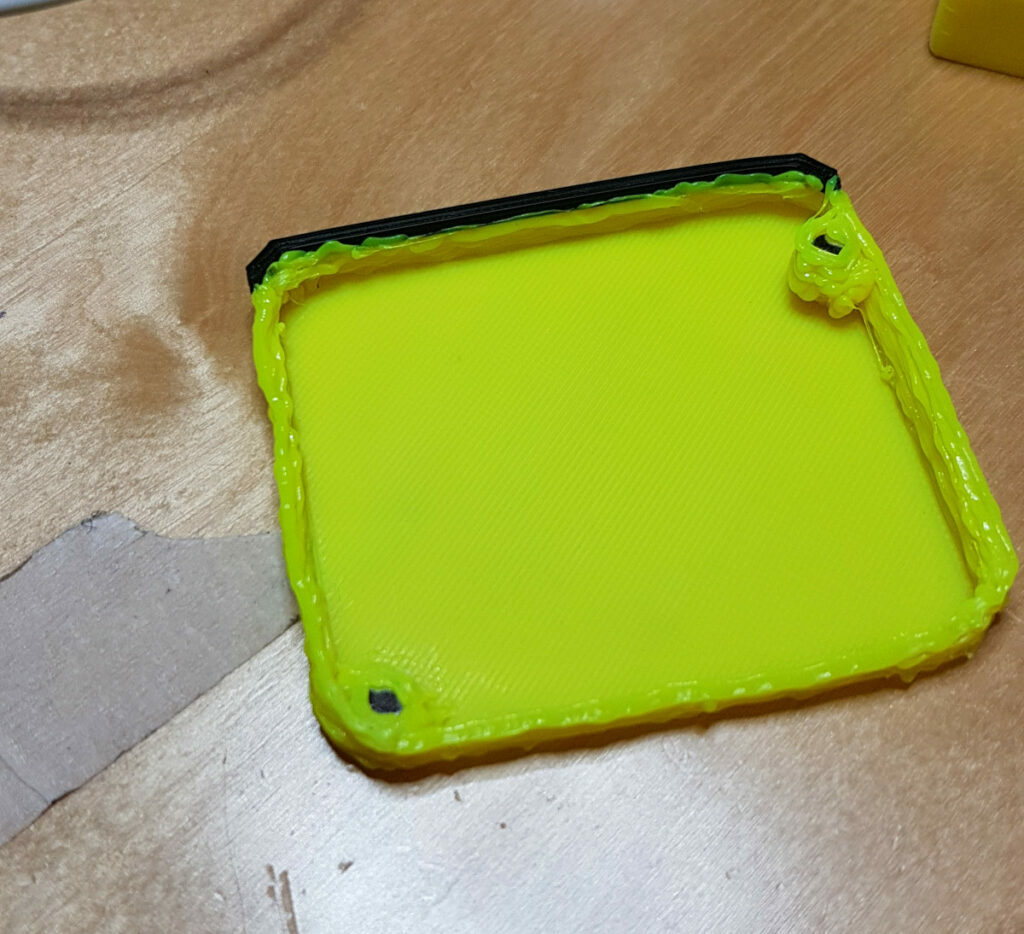
But did it work? you bet.
It was almost finished bar the screen. So I started working on the animations that would be played in regard to the Pwnagotchi status, suchs as “handshake collected”, “bored”, “new peer found” etc.
I made some waving animations for when an handshake is collected, P0wnab0b will randomly pick one for you to enjoy such as this one
Everything seemed to fit nice. I also added a small piezo buzzer who was kindly donated by its little brother B0B. I also added a small push-button for a clean shutdown.
I then added a small protection for the screen
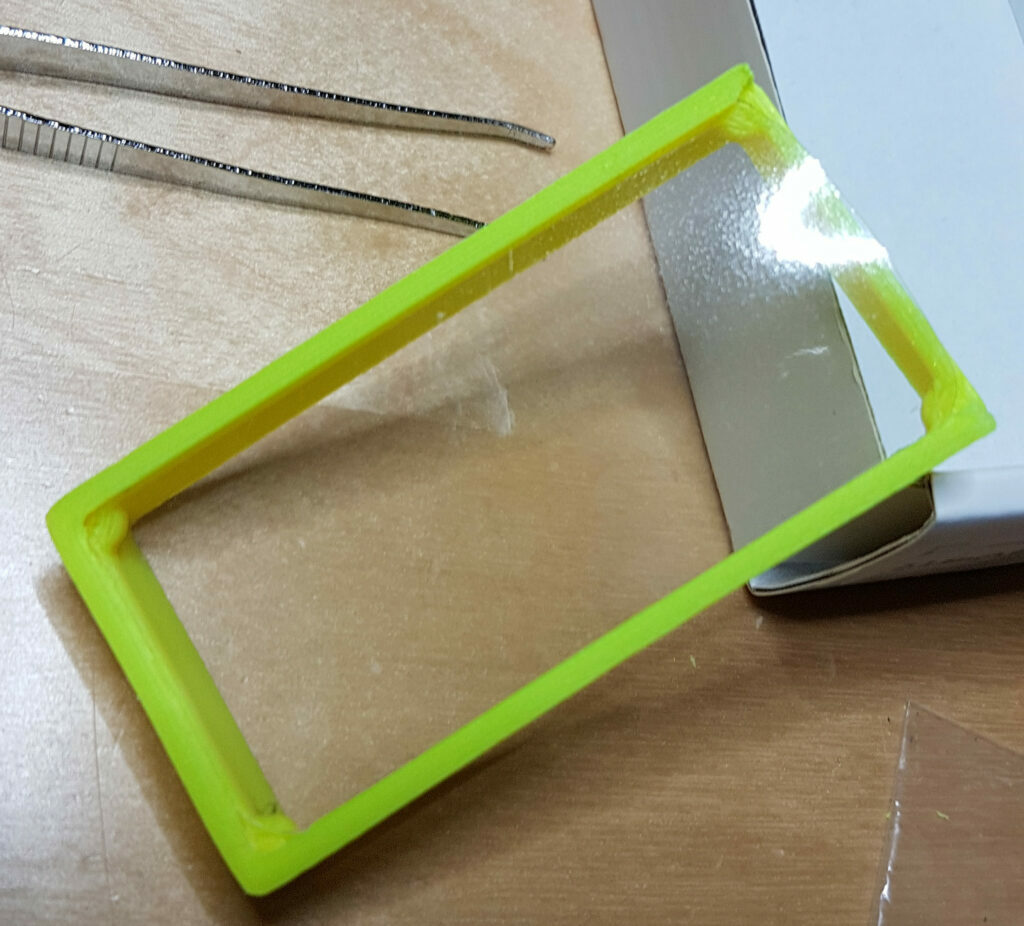
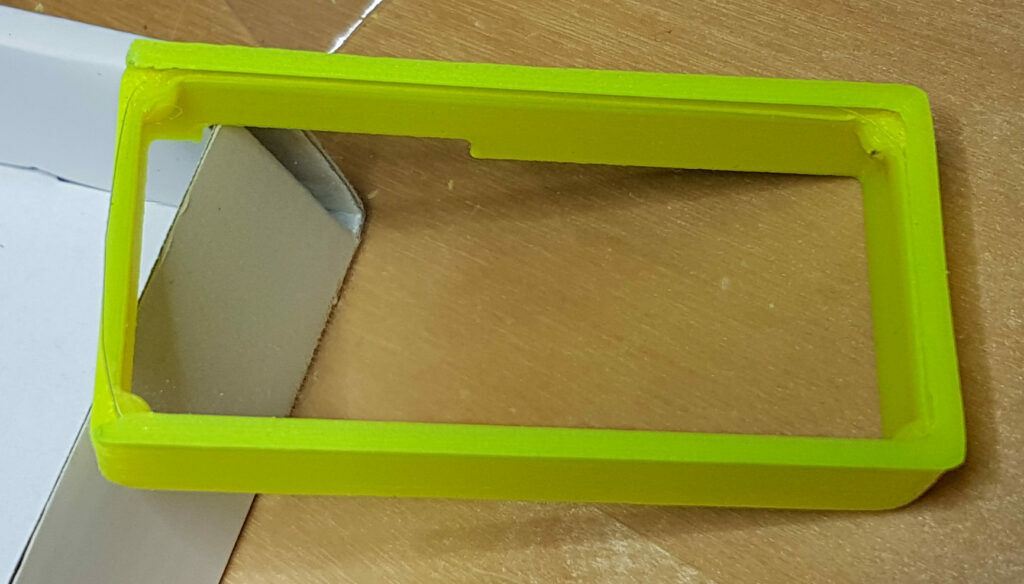
Yep I badly wanted to protect the screen.
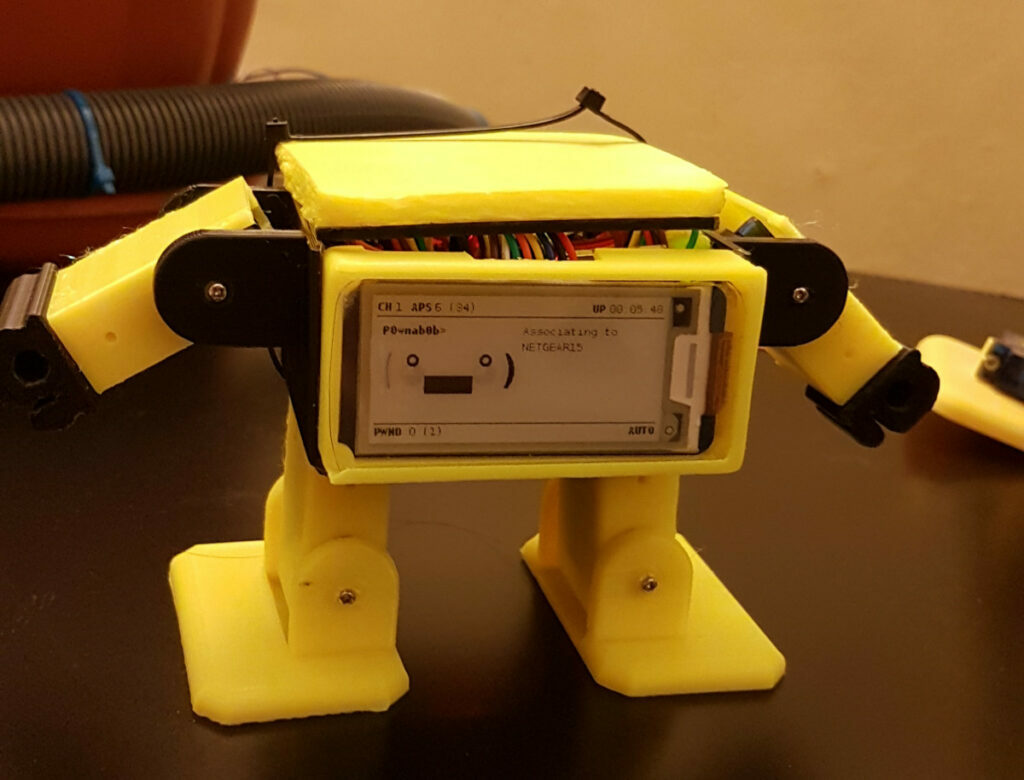
ah, the screen ..
I had two DOA screens and almost lost hope until the third arrived in working conditions.
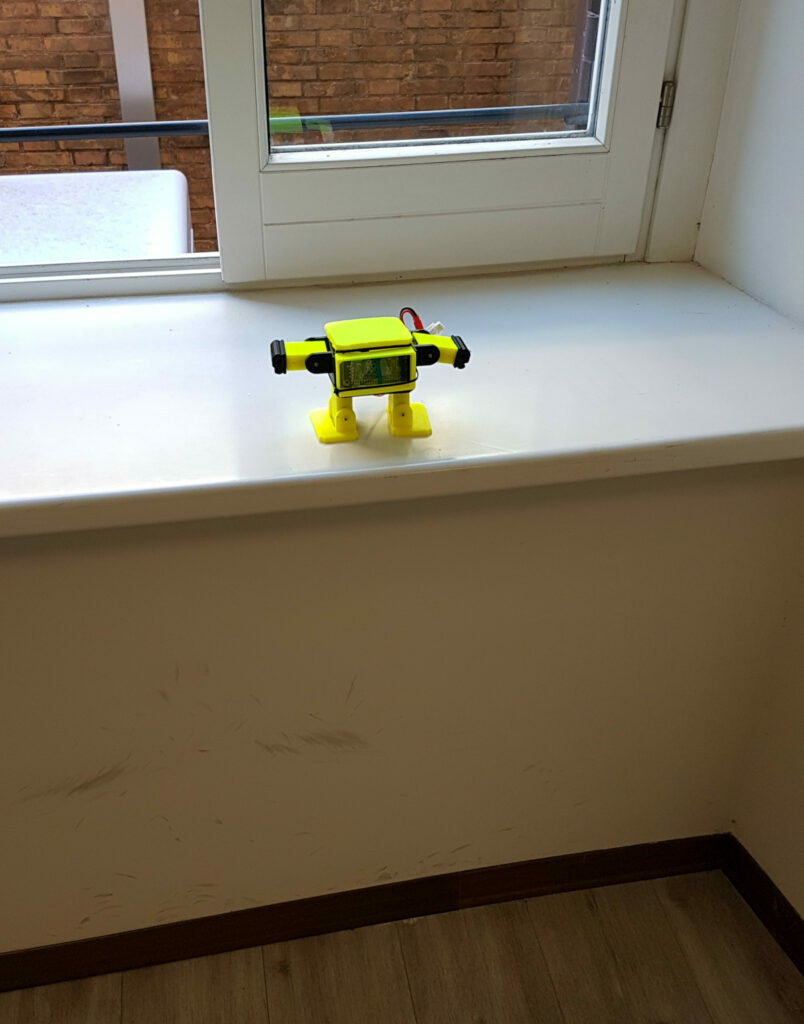
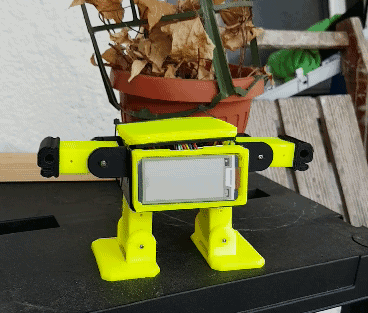
But not having the screen didn’t stop me to get the little buddy around to test the battery!
Until today, when a not-DOA screen arrived. Yay!
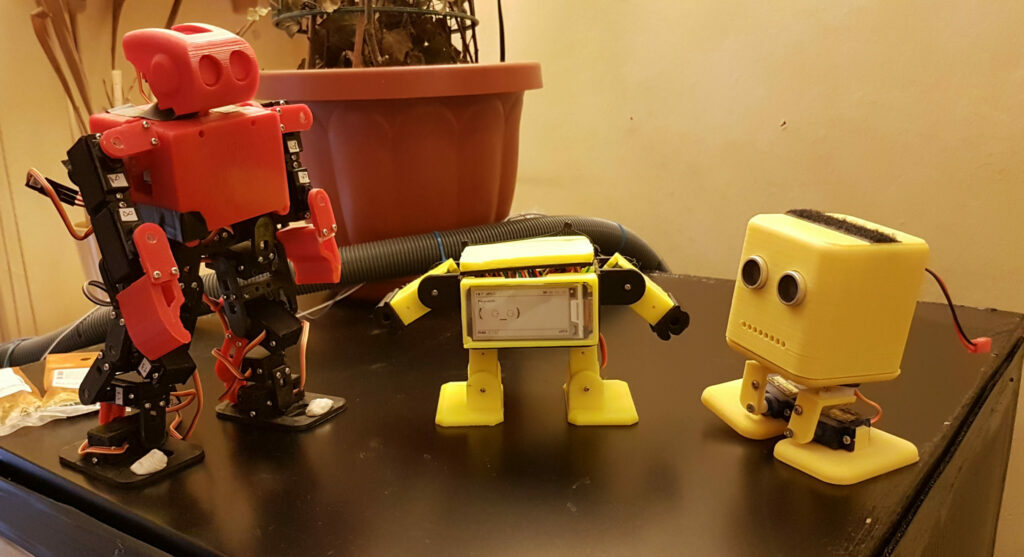
The funny thing in this photo is that the P0wnab0b could actually hack into the wifi network created by the red robot brain.
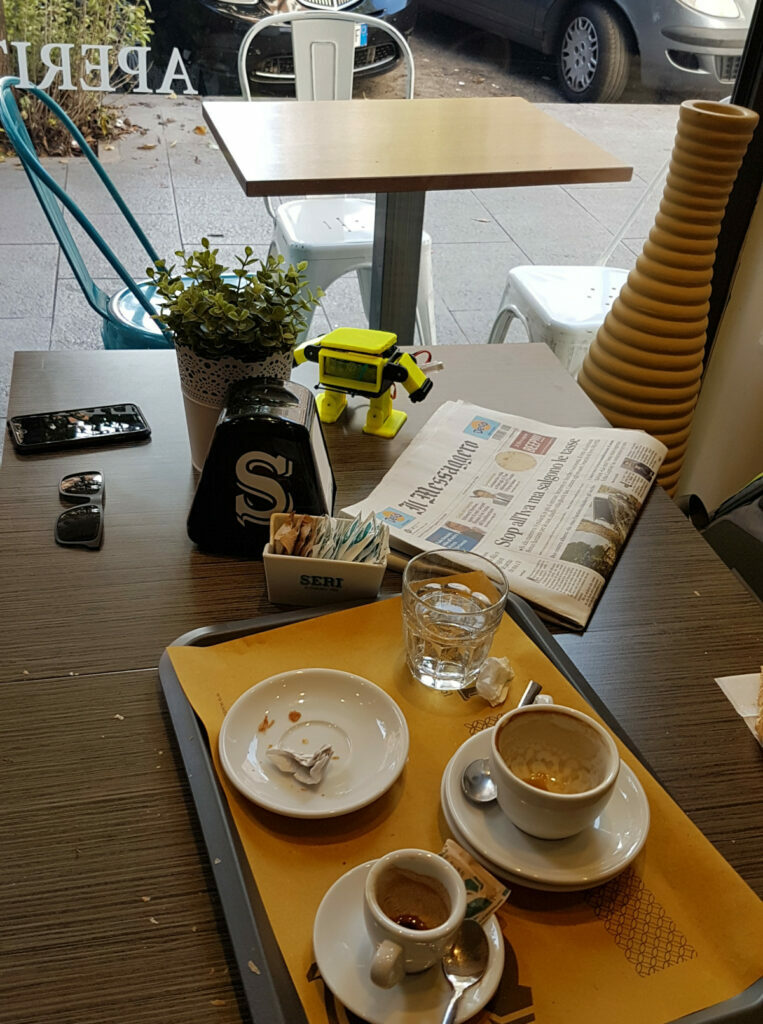
and so, here we are. P0wnab0b is going around the world making new friends. Enjoy some gif of HIM starting up ..
He gets very excited when he is able to capture handshakes!
It’s all for now folks! I’ll leave some references here and add some code once I polished it a bit. Thank you for reading this far.
References
- Pwnagotchi https://pwnagotchi.ai/ by @evilsocket
- BOB the robot https://www.thingiverse.com/thing:43708
- Pwnagotchi case https://www.thingiverse.com/thing:3879459 by @elkentaro
- Tini Plan Minions https://www.thingiverse.com/thing:2414933 by George Chiou